 STEP-BY-STEP
 STEP-BY-STEP
 Make
your presence known on the net by building your own website. We show you
how
We've put together a step-by- step guide to building your own website
using Adobe PageMill - one of the most popular website design programs
for the PC, and also a Computeractive But It! award winner. Bear in mind
that other web-design programs will work very differently, and even within
PageMill itself, there are several different ways to go about creating
and customising your web pages. Here's how to knock up a simple website in
a few easy steps.
 STEP 1
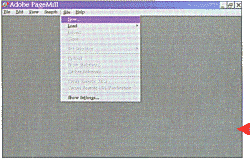
After installing PageMill on your system, you should be able to start the
program in Windows by going to Start, Programs, Adobe and selecting
Adobe PageMill 3.0. Close the new page that PageMill automatically presents
you with when you begin the program. Then, from the toolbar, select Site
and
New.
STEP 2
The next stage is to choose a name for your site and a location to keep it
in. At the moment you're not online, so save the site in a new folder somewhere
on your hard disk. Click on Create.
 STEP 3
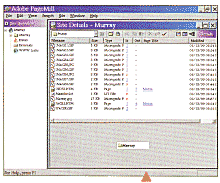
In our website folder (H:\articles\webdesign\murray) we have saved some image
files that we might want to include somewhere in our site. These will appear
in the Site Details box on the right of the screen. On the left-hand
side there is a Site Overview box that shows you the current properties
for your site in a Windows Explorer-style list. At this stage of the exercise
you haven't created any pages or links, so there won't be much to look at
here just yet.
 STEP 4
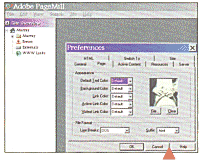
Close down the Site Details box by clicking the 'X' in the right-
hand corner. Now choose Edit and Preferences from the tool
bar. You'll be faced with a dialogue box with several tabs in it. Select
the Page tab and you'll be able to set your preferred text colours,
background images and so on. The default text colour is black but you can
change this using the drop-down lists on this screen. You can also choose
a simple background colour or, as we have done. choose an image file to be
the background on your web page. Now,
e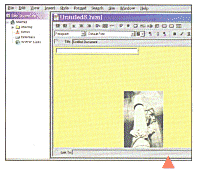 very
time you create a new web page for your site, it will have the same defaults.
Although you can alter these from within each page (see Step 8), keeping
the same defaults will help your pages have a sense of continuity within
your overall website.
STEP 5
Choose File and New Page from the toolbar. This will bring
up a new web page with your chosen backdrop. At this point you can enter
and arrange text and images in the way that you wish them to appear on the
page. Explore the tool
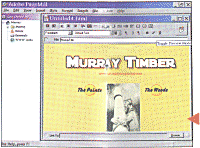 bar along the top of the new page.
There are tools for creating and resizing text boxes or importing image files.
These tools work much like a standard word processor, so they're quite
easy to get the hang of. Use these to get your page looking just right.
STEP 6
You can preview your work at any point by clicking in the Toggle Preview
Mode button in the top right-hand corner of the web page box. This will
show you what your page should look like when viewed in a web browser.
STEP 7
Once you have created a few pages like this, you can create links from
one to another. All you need to do is
 right-mouse click on the object or
text that you want to use as a link and then select Make
Link.
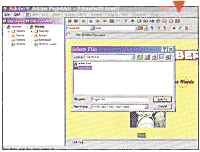 A dialogue box will appear from which you can choose the
page you wish to link to.
STEP 8
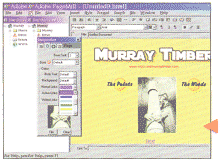
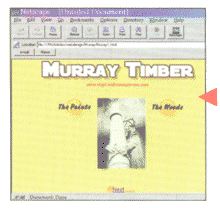
To customise any of your page defaults from within the page itself, you can
open up the handy Inspector window by selecting Show the View
menu. Using the Inspector you can easily alter the basics of each
page, such as text colour and background. Here we have changed the colour
of linked text to pink to make it stand out more. We've also changed the
active link colour to black.
 Finally.
it's best to preview the page to view your changes. Try clicking on a link.
It should take you directly to the page the link refers to.
STEP 9
Now comes the real test. Open up your preferred web browser and choose
Work Offline. Then go to the File menu and open up the home
page of your new website. It should all look and function in the same way
as it does in the PageMill Preview mode. If it doesn't, then don't worry
as
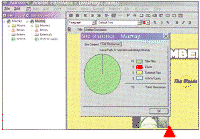 all
browsers work differently and there are bound to be a few discrepancies.
A little fine-tuning in PageMill's Editing mode should sort out any problems.Keep
testing until you get it right.
STEP 10
Back in PageMill, check your website for errors by choosing
Site and then
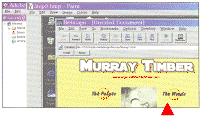 Show
Statistics. On the Site Resources tab, make sure that Errors
reads zero. Also make sure that the overall file size of your site doesn't
exceed the amount your service provider allows. Now you're ready to unleash
your website onto the internet for the whole wide world to see.
STEP 11
Right-mouse click on your website folder in the Site Overview window,
choose Edit Site Settings from the menu. To actually post your site
on the web you'll need to enter the same username and password that you use
to log on to the internet. At this point, it's worth liaising with the
sup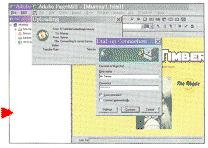 port
team for your service provider in order to make sure that all the information
you are entering here is correct.
STEP 12
Then it's simply a matter of selecting Site and choosing
Upload from the menu.
This will kick your modem into gear, connect you to your internet service
provider and upload your site onto the web. Make a note of the internet address
you are assigned to and then hand it out to all your friends. Congratulations!
You are now a part of the cyber-revolution!
See Also Making Webpages/using FTP , Building Websites